Designing a Set on a Sound Stage: Concept to the Big Screen
- Vanessa Miles

- Jun 30, 2018
- 3 min read
Updated: Jun 25, 2025
This will show you the stages I went through, as the production designer, to create an underground bunker on a soundstage. You will see inspiration art, sketches, concept art, 3D renderings in SketchUp, photos taken during construction on up through set dressing, and finally a screen grab or two from the final film.
(Note: All photos are copyright Vanessa Miles Design and/or Mad Anth'm Pictures, the production company for the feature film, Project Eden, unless otherwise noted) Project Eden can be watched on HULU.
We needed a secret off-the-grid underground facility for the film. The script called for an underground bunker/ tunnel system that was to have been carved deep inside a natural cave system. In order to make this we shot the exteriors at a beautiful real cave in Waipu, New Zealand. We'd considered some actual World War II underground bunker/tunnels outside Auckland to shoot on location but felt it would be far too limiting, and cramped. So we built our own "underground" bunker on a soundstage at Stage West which we could fully control the look of as well as move walls and pull ceilings. To achieve the sense that the bunker system is bigger than it is we use trickery of camera shots which you can see in the concept art, overhead drawings, and 3-D rendering. Mainly we needed one room, where the walls could be removed, for the majority of the scenes shot there. We also need the entrance where it goes from being a cave to our carved out underground bunker and the appearance of many criss-crossing hallways to achieve a maze-like effect.
I sketched/drafted out some floor plans and gathered inspiration art, while in constant communication with the directors over the look & feel, and worked with Alex Drummond to develop the concept art images, first working in black & white before finalizing the colored concept images. Then I made a 3D version of the set in SketchUp and outputted construction documents for the build team. Probably the most useful tool in the end for everyone was the 3D rendering. It allowed the art director, construction team, plaster team, faux finishers, set dressers, et all to previsualize the finished set and grab all their dimensions and cut list. This also leaves no room for confusion. The directors & the DP were also able to put in the height of the actors and get a 3D look of the blocking which helped them determine camera angles and generate some storyboards. Making a 3D model may seem like a small thing to do but in the end it helps so many departments, not just the art department. Since then I have even done it for non-sound stage builds on occasion because it can be so useful.
First, we scouted the cave and got some reference pics:


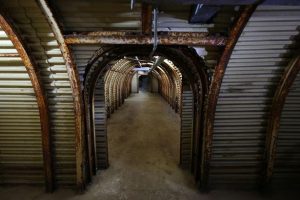
Here is one of the inspiration pics for the tunnels:
After initially assembling a nice collection of inspirational images to convey the look and feel, those and some rough sketches were sent to the concept artist, Alex Drummond in Australia. Here are his final renderings of the hallway:
(Note: all pictures forward are copyright of Mad Anth'm Pictures)

Alex's rendering of basic floorplan based on our rough sketches and his concept art for the meditation room:


We then made a 3D model of the tunnel system (in metric since we weren't in the US):


There was one part of the tunnel that wasn't going to be quite so exact. Here is a rough sketch on some scrap lumber to explain the transition from the cave into the tunnel:

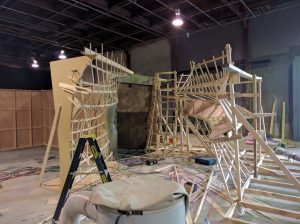
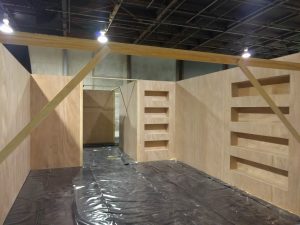
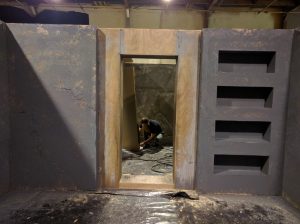
Construction begins:
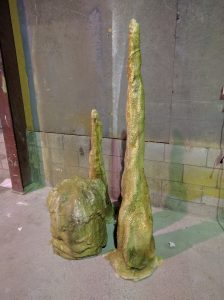

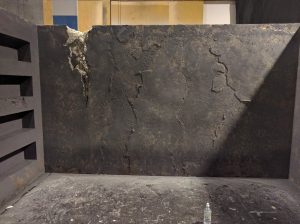
Then comes the plaster:

Followed by faux finishing:

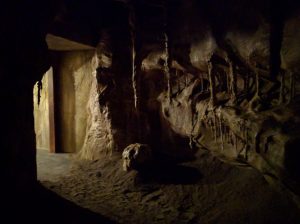
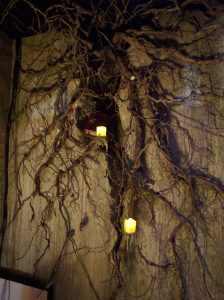
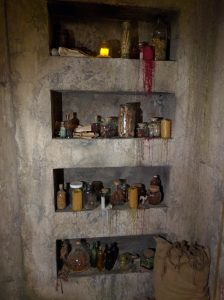
Set Dressing is added:


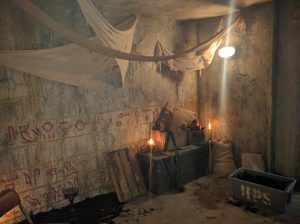
Bring on the actors for some blocking:

Here are a final couple screen grabs, but to see the whole film you need to go to Amazon Prime or HULU:


So that's a sound stage build from conception to big screen. I hope that gives you insight into the process of a production designer and the art department. Thanks for reading! Vanessa


Comments